|
Secrets of Digital Photography Photoshop Curves Handy little things |
Throw me a curve! Buried in the lore of Photoshop is the exceedingly handy Curves control.
Get to know it. You can do a lot with this tool.
It is a shame that it is not available in Photoshop Elements.
When you open an image, it won't be perfect. Well, not most of the time, if you get picky like I do.The contrast will be off, the color will be off, the highlights won't show detail, the shadows will be too light--whatever it is, often the Curves control can fix it. See page 24 in the eBook for some really interesting things you can do with the Curves control. Follow that with the Curves-implemented white balance correction technique that sits on page 25 of the eBook V1.0~2.0h. (It's in Chapter 2 of eBook V3.0+)
Now get ready to play.
Curves can be saved and reused. You'll probably want to start a file of your favorites. I have, and it's available here so you can try these on your images. You can load the individual curves or take the folders with all of them in it. Windows uses the .exe suffix, Macs use the .sea.bin suffix folders. Both folders are identical in content.
The ones in this folder perform some very useful things that simple gamma controls (as can be performed using the Levels control) can't do.
Here are some examples
No curve applied. This is the original of the shot:

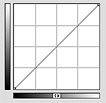
The chart at the right is the graphic display from the Curves control. With nothing changed, it's a simple 45 degree line.
Let's see what happens with various curves applied from the set on the CD.
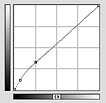
Let's try the ShadowBoost curve.

It brings up detail in shadows with very little influence on the highlights. Since the curve is all above the 45 degree line of the original, some exposure lift is seen throughout.
Let's try the FilmLook2 curve.

Contrast goes down. That happens when the slope is less than 45 degrees. Shadows are lifted and highlight detail is extended. The impression is that of extended dynamic range.
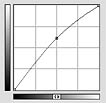
Let's try the GammaLift curve.

This brings the level of the shot up quite a bit. But notice that the center point of the curve has been lifted only about 10% of the height of that center grid line. A little move makes a big difference.
This same exact effect can be created with the Gamma point being moved in the Levels control. Only here, you can see the way the curve arcs through the gamma point. In a sense, all the points you can create on a curve are gamma points relative to the other points above and below them.
Lets's try the ContrastIncrease curve.

The mid point is exactly where it started but the majority of the slope is now steeper than 45 degrees. That makes the image contrastier without actually crushing the blacks and whites of the shot.
For fun, let's see what a curve looks like when it is NOT continuous. Here is the Poster curve and it was made by drawing flat lines, not by moving points along the curve.

There are more curves in the file to play with. And you can make and save your own curves easily.
Have fun.
-iNova
Get the eBook. We have a secure order page that will allow previous eBook owners to upgrade for low cost, too. Or you can call direct and order from the publisher by phone or FAX.
Phone:(310) 475 2988 (M-F 9-5 Pacific Time)
FAX (310) 475 9486 (24hrs).


